Getting Started
Cruise Tycoon is a fleet management game. You earn money from voyages, spend it on ship layouts, crew, repairs, harbour expansion, and new ships, then use the expanded fleet to run higher-value routes, earn seasonal trophies, and climb competitive ranks.
- Claim or buy ships.
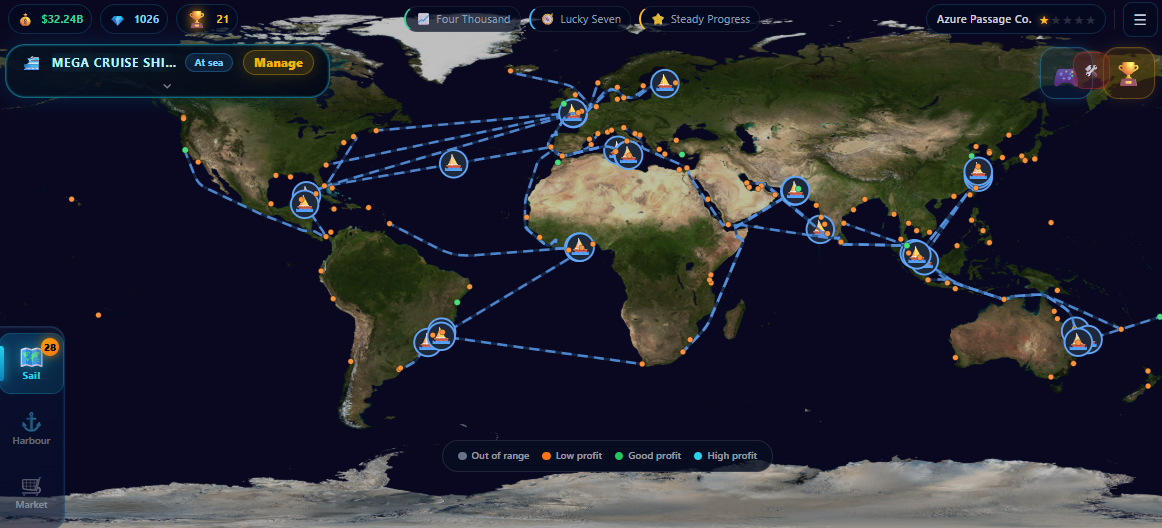
- Choose routes within your ship's fuel range with positive projected profit.
- Earn money from passengers and cargo.
- Add food/leisure rooms for revenue boosts, build crew quarters, repair condition, and hire specialists.
- Unlock new zones and buy dock slots to expand your fleet.
- Earn trophies from voyages for seasonal leaderboard standings and competitive rank promotions.
Focus on profit per voyage before fleet size.
- Pick routes within your ship's fuel range where projected profit is positive. Hire a Route Manager to see which ports are green.
- Place food and leisure rooms, not just cabins — their deck boosts multiply revenue.
- Build crew quarters so you can run Standard crew without understaffing penalties.
- Repair before condition slips out of the healthy band. The penalties compound fast below that.
Beginner Tip
A smaller ship with good food/leisure rooms, adequate crew, and healthy condition will out-earn a bigger ship with empty decks, Lean crew, and worn condition.
Voyages & Profit
Voyage profit = passenger revenue + cargo revenue + deck boosts - fuel cost - crew wages - operating costs - repair cost. Every room, crew choice, pricing mode, and route distance feeds directly into that math.
- Distance affects trip time, fuel use, and earning potential.
- Passenger demand, cargo demand, and route wealth all matter.
- Each route has its own passenger demand, cargo demand, and wealth values. Higher-demand routes earn more per passenger and per cargo unit.
- Projected profit includes a small random variance, and mid-voyage events can shift the final number up or down.
- Temporary route bonuses can make certain destinations much better than usual.
Longer routes earn more base revenue but also cost more fuel, cause more condition loss than short routes, and lock the ship for longer. A long route on a ship with poor condition or Lean crew can lose more in penalties than it gains in distance revenue.
Why did this route lose money?
- Operating costs from rooms exceeded what the route could earn.
- The ship had too few food or leisure rooms, so deck revenue boosts were low.
- Crew was set to Lean or crew quarters were insufficient, applying the staffing efficiency penalty to revenue.
- Ship condition dropped into a penalty band, reducing satisfaction and performance.
- Route saturation cut demand — a route that has carried a lot of passengers loses demand until its pool refills.
Before launching a voyage, pick a speed:
- Slow: the voyage takes longer, but it burns less fuel, causes much less wear, and actually earns a little more (guests enjoy the relaxed pace). Great for long hauls and preserving condition.
- Medium: standard everything. The default.
- Fast: finishes sooner, but earns a little less and costs much more wear and fuel. Use only when you need the ship back quickly and condition isn't a concern.
During voyages, random events appear. Some are automatic (good or bad luck), some give you an A/B choice with risk, and some are skill-based mini-games.
- The first event on each voyage is always a mini-game.
- Mini-games are graded: gold, silver, bronze, or fail.
- Choice events have a 30-second countdown. Picking the riskier option can pay off or backfire.
- Events can award bonus money, gems, or cause setbacks.
Good to know
Bonus ports rotate by zone every 3 hours, each active for a two-hour window, with one bonus port live per zone at a time. Most windows give a modest green revenue boost and a few give a bigger cyan boost. Check the map for the highlighted port before choosing a route.
Route saturation
Saturation is driven by the total passengers a route has carried, not the number of trips. As those cumulative passengers climb, demand drops in steps, and a heavily-farmed route can shed a large share of its demand. The pool refills gradually over time (faster for large fleets), so rotating across different routes keeps demand high. Bigger ships saturate a route faster because they carry more passengers per sail.
Ship Design
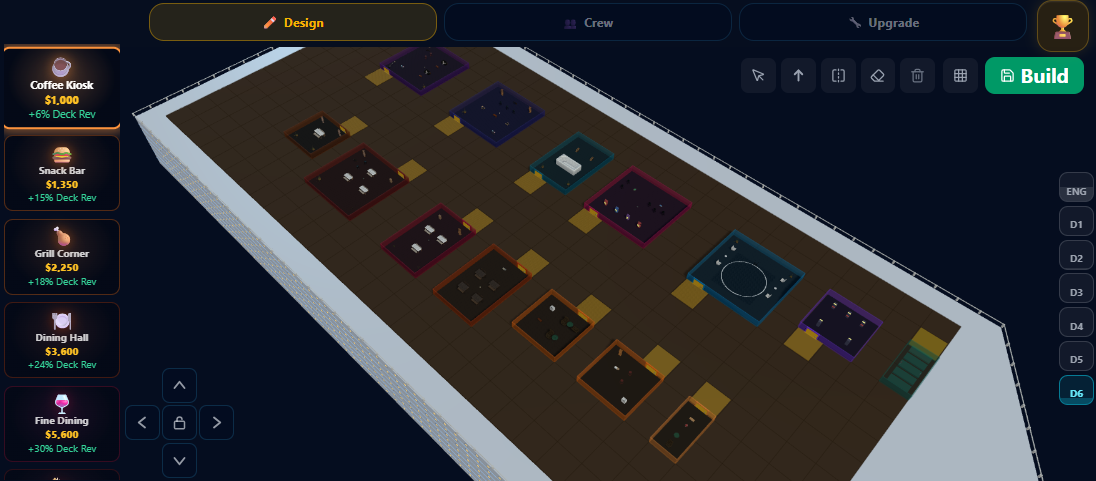
Every room you place affects the profit formula: cabins add passenger capacity, food and leisure rooms add revenue multipliers, utilities add cargo or crew support, and every room adds crew requirements and operating cost.
- Cabins: increase passenger capacity and set the ceiling for guest revenue.
- Food rooms: boost deck or ship-wide revenue, from a small lift on an entry-tier kiosk up to a big ship-wide boost on a top-tier restaurant. Higher-tier food rooms require more crew but their revenue boost usually exceeds the added crew cost.
- Leisure rooms: also boost revenue, from a small lift on a simple card room up to a large one on a casino. Some rooms like Sky Lounge and VIP Club apply ship-wide instead of just the deck they sit on.
- Utilities: support cargo, operations, crew quarters, and the ship's working structure. Crew Quarters directly increase how many crew you can staff.
Every room adds operating cost per voyage. More cabins without food/leisure boosts means more passengers but at base revenue rates. More rooms without enough crew quarters means understaffing penalties. Food and leisure boosts stack additively and cap out per category, so spreading rooms across both categories is better than loading one.
Every deck above the entrance deck needs stairs connecting it to the rest of the ship. The game runs a reachability check from the ship entrance on the bottom deck. Rooms that cannot be reached through doors and stairs show as unreachable (red highlight) and block saving. If you cannot save your layout, check that every deck has a staircase connecting down.
Upper decks get a small revenue premium, lower decks get a slight penalty. Put your highest-value rooms on upper decks when you can. Some rooms like Snack Bar and TV Room require a couple of decks before they unlock.
Simple design advice
- Spread rooms across food and leisure — each category caps out, so stacking one past the cap wastes slots.
- Balance cabins (passenger capacity) with food and leisure rooms (revenue boosts) and cargo holds (cargo income). All three contribute to total voyage revenue.
- Crew quarters are essential — without enough crew capacity, the staffing penalty reduces revenue on every voyage.
- If the ship is already sailing, design changes may queue until docking.
- Make sure every deck is connected by stairs before trying to save.
Staff & Auto-Sailing
The game does not block you from sailing with low crew. You can launch with Lean crew or even with almost no crew quarters, but the staffing efficiency penalty directly reduces revenue and satisfaction on every voyage.
- Every amenity room requires crew. Total crew cost scales with the number of crew you run each voyage.
- You pick a crew level per ship: Lean (fewer crew, lower wages but reduces satisfaction and revenue), Standard (the baseline), or Premium (more crew, higher wages but boosts satisfaction and reputation gains).
- Understaffing directly reduces revenue through the staffing efficiency modifier and lowers satisfaction, which hurts reputation.
- A ship with almost no crew quarters gets a severe staffing penalty that can wipe out most of a voyage's earnings.
- Route Manager (two levels): the first level splits ports into green (good) and orange (weaker). The second adds cyan highlights for the very best routes. Without one, all reachable ports show orange.
- Cruise Director: unlocks the Auto-Sail toggle. Stamina starts small and can be trained higher. Stamina restores one point every few hours while docked (about 3 hours on small hulls, longer on flagships) — or spend gems to add a point instantly from the Crew panel (cheaper on small ships, pricier on higher tiers).
- Both specialists are hired per ship and their costs scale with ship tier.
Automation is useful, but not free value
Auto-sail keeps ships sailing automatically, but each auto-sail leg earns fewer trophies than a manual voyage. For seasonal trophy competition, manual play with longer routes earns more trophies per hour.
Reputation & Condition
Ship reputation and company reputation are separate scores that move based on voyage satisfaction and condition loss. Ship reputation reacts faster; company reputation is averaged across all ships and moves more slowly.
- Ship reputation belongs to one vessel. Updates after every voyage based on that voyage's satisfaction and condition loss.
- Company reputation averages across all ships with heavier damping. Takes many voyages to move noticeably.
- Voyage satisfaction score (driven by layout, staffing, and condition)
- Low condition loss during voyages
- Adequate or premium crew levels
- Understaffing and high condition loss drag reputation down
- Excellent: no penalty
- Good: a slight satisfaction dip and minor performance penalty
- Worn: a noticeable satisfaction and performance penalty
- Poor: a serious satisfaction and performance penalty
- Critical: a severe satisfaction and performance penalty
- Short routes lose a little condition, medium routes more, long routes the most.
- Adequate maintenance crew reduces wear; understaffed maintenance increases it.
- Repairing at the dock restores the ship to full. The bill scales with how much condition is missing and with the ship's tier, so a worn high-tier ship is expensive to fix.
- Repair early. The penalty from Poor or Critical condition costs you more in lost revenue than the repair bill.
Why reputation may feel slow
Company reputation averages across all ships and updates more slowly than ship reputation. One strong voyage moves ship reputation noticeably, but company reputation needs consistent high-satisfaction voyages across multiple ships to climb.
Harbour & Expansion
Fleet expansion requires harbour infrastructure. You unlock zones, buy dock slots within zones, upgrade dock tiers to host bigger ships, and buy ships separately. Each has its own cost and requirements.
- Zones decide where your fleet can operate next.
- Dock slots decide how many ships can actually sail. A ship must be assigned to a dock before it can depart — unassigned ships stay idle.
- Dock tiers decide which ship tiers a slot can host.
- You can buy as many ships as you want, but only ships in a dock slot of the right tier can leave port. Your dock count is the real fleet cap.
Buy another ship when you can afford its rooms, crew, and repairs — not just the hull price. Upgrade dock tier when you need to station a higher-tier ship. Unlock a new zone when route saturation on your current zones is costing you more than the unlock fee.
Zones unlock in rising bands beyond your home zone. Each band costs more and asks for more of your fleet:
- Early bands: cheap, and just ask for a couple of starter ships.
- Mid bands: pricier, and require a mid-tier ship.
- Later bands: gated behind owning a sizeable number of docks.
- Late bands: a serious investment, gated behind a higher-tier ship.
Dock purchase and upgrade costs use a multiplier that grows with each zone you unlock — cheapest at home, steepest in the last zone. Early zones are cheap; late-game docks are a serious investment. Upgrading dock tier lets you station bigger ships there.
Trophies & Seasons
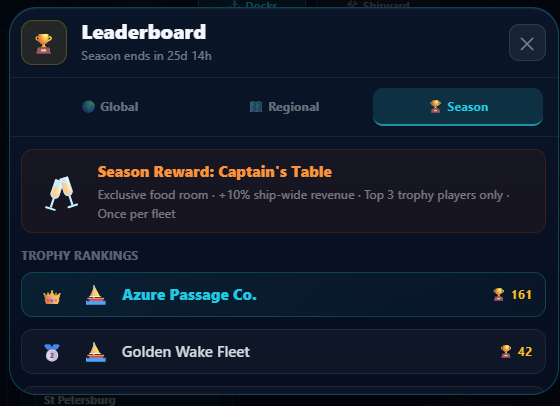
Trophies are seasonal and reset at each season boundary. They are earned per voyage based on duration AND passenger satisfaction, scaled by ship tier. Higher-tier ships with well-built layouts earn significantly more trophies. Trophies determine your position on the seasonal leaderboard and bracket promotions.
- Base trophies scale with voyage duration — you earn a step for every few minutes at sea, up to a per-voyage cap.
- Multiplied by a tier-satisfaction bracket: ships with very low satisfaction earn no trophies.
- Entry-tier ships get the smallest multiplier; top-tier ships get the largest, so a well-run flagship earns far more per voyage. The final award is capped.
- Auto-sail legs earn a reduced count.
- Trophies reset at the season boundary (the 10th of each month).
The multiplier depends on your ship's tier and the voyage's passenger satisfaction:
- Very low satisfaction: no trophies at any tier (empty/bad ships earn nothing)
- Low-to-mid satisfaction: every tier earns the base rate
- Mid-to-high satisfaction: the multiplier starts climbing with tier
- High satisfaction: full multiplier — higher tiers earn the most
A permanent rank ladder sits on top of the seasonal system. Ranks never reset:
- Deckhand → Seafarer → Helmsman → Navigator → First Mate
- Captain → Commodore → Fleet Admiral → Sea Lord → Poseidon
Everyone starts as Deckhand. At each season end, the top slice of players in your rank bracket get promoted. You need at least one voyage in the season to be eligible.
Rewards are based on where you place inside your own competitive-rank bracket, not the global board:
- Bracket champion: the top cash-and-gem payout plus your bracket's exclusive room
- Runners-up: a large cash-and-gem payout plus your bracket's exclusive room
- Rest of the top finishers: a solid cash-and-gem payout
- Everyone else who sailed: a participation cash-and-gem payout
The exclusive room depends on your bracket — Captain's Table (Deckhand), Royal Suite (Seafarer), Imperial Lounge (Helmsman); higher brackets are still to come. Each is a rare ship-wide revenue room earned only by finishing near the top of your bracket for the season.
What determines trophies
Build your ships well (rooms, food, leisure, crew) to raise satisfaction. Use higher-tier ships on longer routes. Empty or poorly designed ships earn almost no trophies regardless of route length. The system rewards both active play and smart ship design.
Goals & Progression
Progress is tracked across multiple systems: per-voyage profit, three milestone lanes, seasonal trophies, competitive ranks, ship/company reputation, and lifetime earnings tiers.
- Increasing profit per voyage (rooms, crew, condition, pricing dial)
- Completing tutorial sections (earn money and gem rewards)
- Claiming active lane goals (tap the pill in the top bar when ready)
- Earning trophies from longer voyages for seasonal standing
- Fleet growth: more ships, more zones, higher-tier docks
- Ship and company reputation scores
- Milestone lanes: Growth (economy goals), Discovery (exploration), and Fame (reputation and voyage quality)
- Competitive rank promotions at season end
- Lifetime earnings tiers
How milestone lanes work
Each lane shows one active goal at a time in the top bar. Goals are claimed manually by tapping the pill when the condition is met. Growth goals track fleet size and earnings. Discovery goals track ports visited, routes completed, and events experienced. Fame goals track reputation milestones and voyage quality. Each lane runs a long ladder of goals.
Gems & Purchases
Cruise Tycoon is free to play. Everything in the game can be earned through normal play — purchases only save time, they never sell power or gate content. There are no ads.
- The Market sells boosts for gems: more revenue, faster voyages, or quicker crew rest.
- Boosts are temporary and optional.
- You never need a boost to progress.
- Gems are the premium currency. You earn them free from events, mini-games, tutorial sections, and season rewards.
- You can also buy gem packs if you'd rather skip waits faster.
- Gems skip remaining voyage time, speed up an in-flight voyage, and refill Cruise Director stamina.
Names & privacy
Tap the ? next to another player’s name to report it or block that player. Delete your account any time in Settings → Delete account & data.
No pay-to-win
There is nothing you can buy that another player can't earn by playing. Purchases only trade money for time. Rooms, ships, zones, ranks, and trophies all come from gameplay.
Strategy & Common Mistakes
- Repeating the same route too many times without waiting — demand drops from route saturation until it recovers.
- Adding rooms without building crew quarters — the staffing penalty eats the revenue those rooms should generate.
- Running a ship full of rooms (and their operating costs) on a short or low-demand route that can't cover them.
- Letting condition slide into a penalty band — the lost revenue outweighs the repair bill.
- Relying on auto-sail for trophies — auto-sail legs earn less, so manual voyages on longer routes win the season.
- Skipping food and leisure rooms — their deck revenue boosts are a large part of total earnings.
Before buying a new ship, check: can you fill its decks with rooms, staff those rooms at Standard or Premium crew, and keep condition healthy? If not, the new ship will earn less per voyage than your current one.
FAQ
Quick answers to things the sections above don't already spell out. Use the link on each question to share it directly with another player.
Saves & First Launch
What happens while I am offline?Link
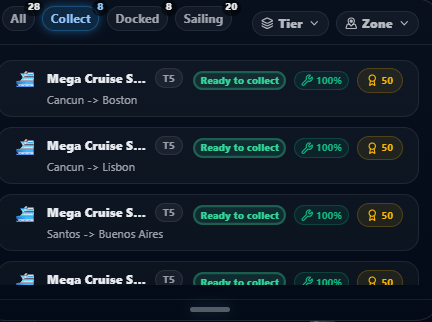
Voyages that finish while the app is closed are resolved when you return. Ships move to their destination and completed voyages appear ready to collect.
Is there cloud save or slot save support?Link
Yes. The game supports multiple local save slots, and when the server is available it also syncs cloud saves tied to your anonymous player ID. If the server is unreachable, local play still continues. Your highest-scoring slot is used for leaderboard submissions.
Why is the first launch downloading so much?Link
On first launch, the game downloads all visual assets (ship models, map tiles, room art, audio) once and caches them on your device. This is a one-time download. After that, updates are tiny and the game works fully offline. If it seems stuck, make sure you have a stable internet connection and restart the app.
Routes & Ships
Why is a route suddenly worse than before?Link
The most common reason is route saturation — demand falls as a route carries more total passengers and refills gradually over time. Other causes: ship condition has dropped into a worse band (check the Crew tab), crew level was changed to Lean, or the speed dial was switched to Fast. If you recently removed food or leisure rooms, the revenue boost from those rooms is also gone.
What does guest satisfaction actually affect?Link
Satisfaction is a per-voyage score computed from your layout (food and leisure boosts), crew level, and ship condition. It directly affects ship reputation gains — voyages with high satisfaction give strong reputation boosts, while low satisfaction drags reputation down. Higher satisfaction also improves the voyage efficiency score shown in results.
Why can't I place a room where I want?Link
Rooms need clear door access — the door clearance tile (highlighted in yellow) cannot overlap another room. Each room also needs to fit within the hull grid. If the spot is greyed out, check that the door clearance area is free and that the room's footprint fits without going out of bounds. Some rooms also require a minimum number of decks to be unlocked before they appear in the palette.
Automation, Docks & Seasons
How does auto-sail actually work?Link
Hire a Cruise Director, then toggle Auto-Sail ON for that ship. Manually launch a voyage. When it completes, the director automatically sends the ship back the other way, then back again, chaining A→B→A→B legs. Each leg costs a point of stamina. When stamina runs out, the chain stops and Auto-Sail turns off. Stamina restores one point every few hours while docked (roughly 3 hours on small ships, longer on flagships). Re-enable and launch again when ready.
Why can't I dock or sail a certain ship?Link
A few things gate ship placement: you need an empty dock slot in that zone; the dock's tier must be equal to or higher than the ship's tier (a mid-tier ship needs at least a matching-tier dock); and the zone must be unlocked. A ship also won't sail until it's assigned to a dock slot, so the number of docks you own is your effective fleet cap. Upgrade dock tier or buy a new slot in the Harbour's Docks tab.
What carries over between seasons?Link
Your company, fleet, layouts, harbour progress, competitive rank, and wider save state carry over. Seasonal trophies do not. Your competitive rank is permanent and can only go up.
Glossary
Route Saturation
A demand penalty that grows with the total passengers a route has carried and refills gradually over time. Spreading sailings across routes avoids it.
Base Voyage Time
The route's stored core duration before temporary speed changes. Seasonal trophy gain uses this timing basis.
Ship Reputation
The reputation attached to one specific ship based on how that vessel has been performing.
Company Reputation
Your broader brand reputation, which moves more slowly and reflects the whole company over time.
Dock Tier
The ship tier a dock can host. Owning a ship does not automatically mean every dock can support it.
Auto-Sail
Automation that keeps ships moving through repeat sailing behavior, supported by Cruise Director stamina.
Lifetime Tier
A long-term status layer based on lifetime earnings rather than one season's result.
Growth / Discovery / Fame
The three live milestone lanes that reward empire expansion, map exploration, and reputation progress in parallel.
Speed Dial
Pre-voyage setting (Slow / Medium / Fast) that trades off speed, revenue, fuel cost, and ship wear.
Competitive Rank
A permanent ladder (Deckhand to Poseidon) where the top of each bracket promotes at season end based on seasonal trophies.
Gems
Secondary currency earned from events, season rewards, and promos. Spend them to skip voyage wait times, speed up an in-flight voyage, or refill Cruise Director stamina.
Reachability
The ship designer's check that every room can be reached from the entrance on the bottom deck via doors and stairs. Unreachable rooms block saving.